What causes point cloud artifacts?
In industrial machine vision applications, artifacts in a 3D point cloud are irregularities that can reduce the application's usability when, for instance, trying to detect particular objects.
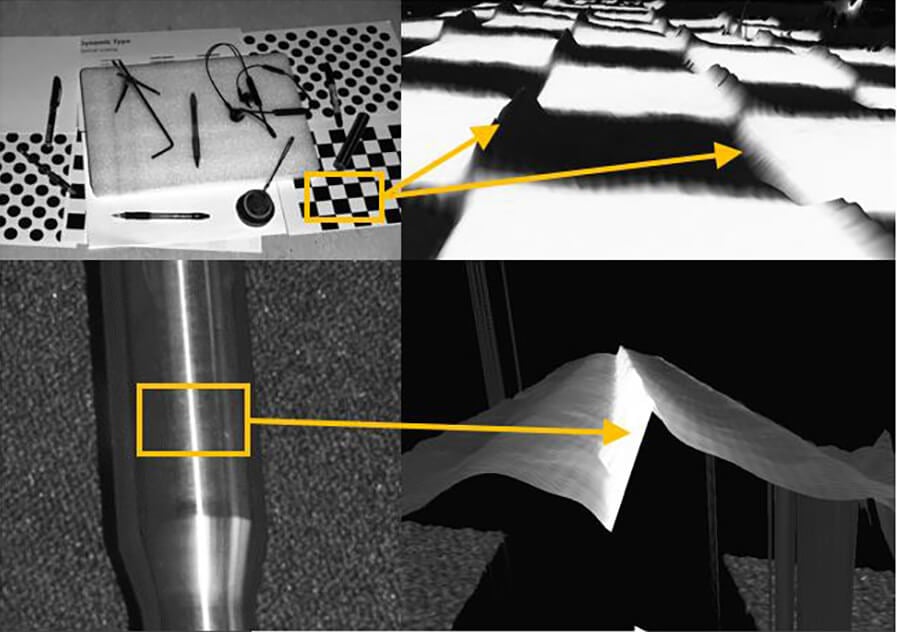
Optical phenomena in the projection and imaging system and decoding of depth cause these anomalies to appear in the captured point cloud. Common artifacts are inter-reflections between surfaces and distortions at contrast discontinuities on surfaces.
These challenges are fundamental and affect active 3D measurement systems such as structured light. Scroll to the end of the article to see how you defeat these artifacts.
Inter-reflections affect point cloud quality.
Inter-reflections can occur between surfaces with specular surface characteristics such as glossy plastic, metal, and ceramics. Each data point in the point cloud is not only directly illuminated by the projected and coded light source, but indirect light reflected between surfaces can also illuminate the data point (the image sensor's pixel).
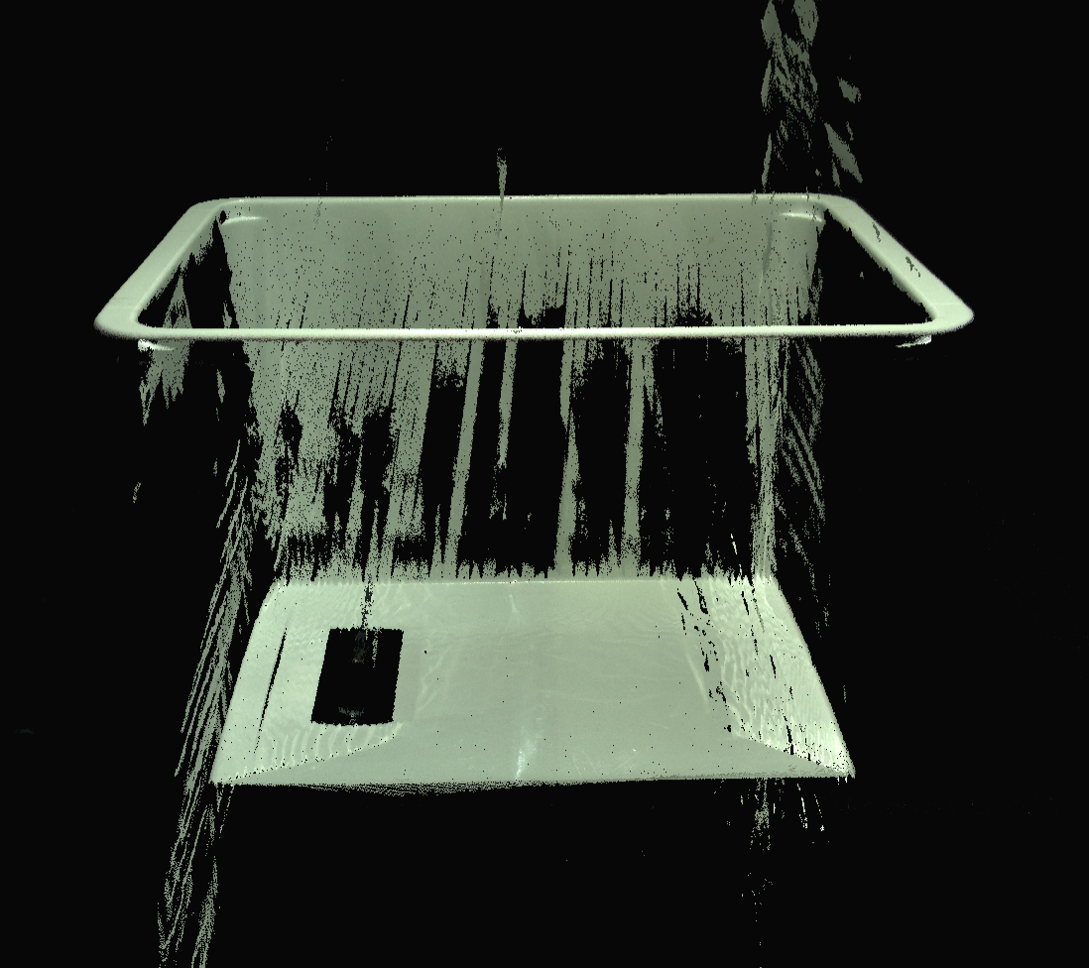
Inter-reflected light causes a mix of signals, affecting the decoding of a points 3D depth. The result is a heavily distorted point cloud with floating groups of points, "ghost planes" and seemingly random scatter of noisy points (as can be seen in the 3D image of the bin below).
Signal blur in active measurement systems.
Another challenge in optical systems is an inherent defocus due to imperfections in the lens and optical phenomena like diffraction and chromatic aberrations. The optical imperfections cause a slight blur between neighboring pixels, and it happens even at "perfect" focus distance. Depending on the size of the camera aperture and the corresponding depth of field and distance from the correct focus distance, the pixel blurring increases.
When using active 3D measurement principles such as structured light, with strong discontinuities in contrast on surfaces, the blurring of different coded signals causes a mixed-signal integration which gives errors in the decoded depth.
In regions with an abrupt change from a highly absorptive to a reflective surface (e.g. in a black to white transition on a checkerboard) or regions with specular reflections such as a on the surface of a shiny metal cylinder, the errors are visible as surface distortion/deformation artifacts (or just "peaks" if you will) in the 3D point cloud.
ContrastDistortion removes artifacts.
Until now, Zivid One+ users have been able to address some of the interreflection distortions by using the reflection removal filter in the software development kit (SDK).
With the release of the new Zivid SDK 2.0, we are releasing a groundbreaking correction of contrast distortions. This unique feature removes one of the primary underlying error sources in the decoded 3D data. The new artifacts correction filter is called ContrastDistortion and is available as part of the new Settings structure of the SDK's API alongside other processing filters for improving the 3D image quality.
The ContrastDistortion filter is unique in the market and available for users of Zivid One+ 3D cameras.
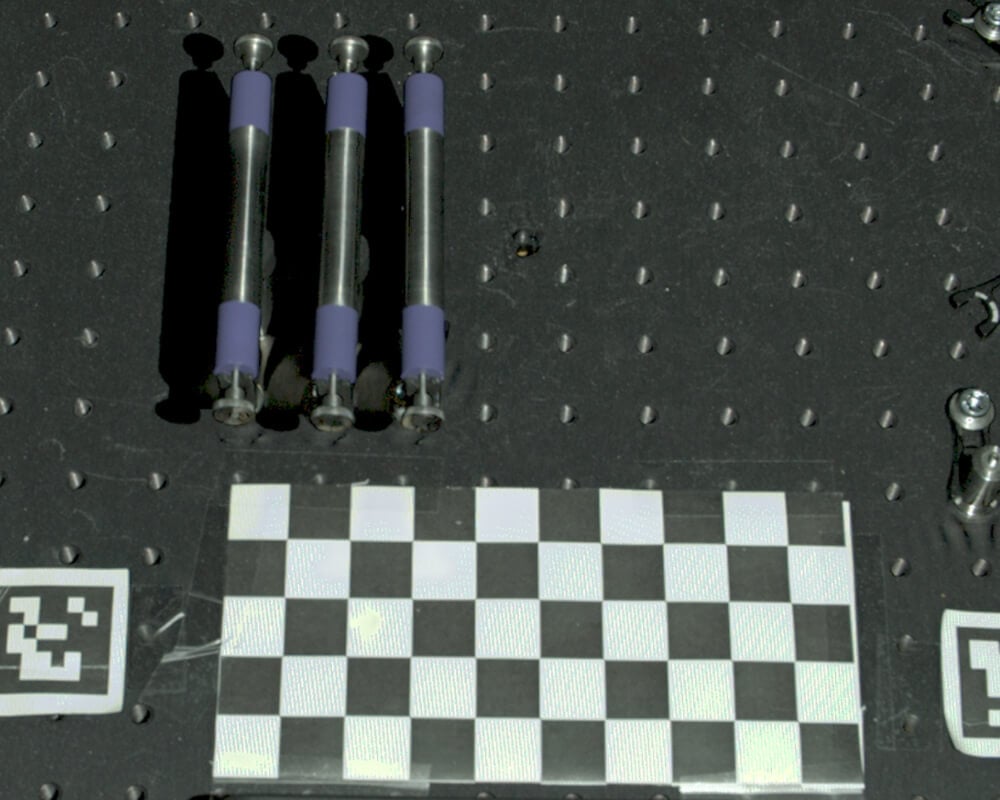
Here are two examples using the new ContrastDistortion correction filter (close up's on the shiny part of the rightmost cylinder and the checkerboard in the image above). Click on the images or move the slider to compare before- and after version of target scene point clouds. The point cloud has a mesh to make the effect more visual.
The shiny metal cylinder shows apparent distortions of the surface, giving it a step-shaped form instead of staying perfectly cylindrical.
In the checkerboard, strong distortions in the underlying planar shape at the black white transitions show up as either upwards or downwards "peaks" in the material's surface.
Resources
You May Also Like
These Related Stories
Showcasing Zivid's Industrial 3D Camera Solutions at the Korea Vision Show (AW2025)
Zivid Omni Engine: World's First 3D Technology for Transparent Objects
