A guide to setting up Zivid Studio and capturing 3D point clouds.
In this video we cover the whole flow from setting up your system, understanding the Zivid Studio user interface, to capturing a point cloud and using the Zivid SDK.
TIPS: If you haven't watched the free Webinar on 3D image quality and exposure training, you should keep that in mind as a resource to understand some of the settings we'll go through in this video.
Now, let's get started:
A quick introduction to new Zivid Studio features.
CAPTURE ASSISTANT
Open the new "Assisted Mode" from the drop down menu in Zivid Studio. The shortcut is Shift + M.
Use the slider to set a target capture time (seconds). This is the total time budget you allow the Zivid One+ 3D camera to perform a capture and the GPU to process a point cloud.
Now press the "Analyze & Capture" button to run the initial, full scene analysis. Zivid Studio returns a point cloud based on a single- or multi-frame (HDR) capture. The suggested frames are sorted to give you the best performance and point cloud coverage
You can quickly perform additional captures with the suggested settings, but without analysing the scene again by pressing the "Capture" button.
Increase or decrease the maximum capture time if you need to optimize the suggested results.
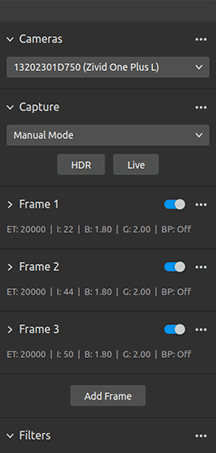
Switch to "Manual Mode" to perform final adjustments of the suggest settings.
In Manual Mode you can enable or disable various frames, or adjust a frame's individual settings to optimize what works best for your target scene and application requirements.
GLOBAL FILTERS
In Zivid Studio you find the filters in the side bar, below your frame settings. Here you can enable and disable filters, and adjust filter thresholds when fine-tuning your settings.

NOTE: The filters work on all frames, and are turned on by default when you use "Assisted Mode".
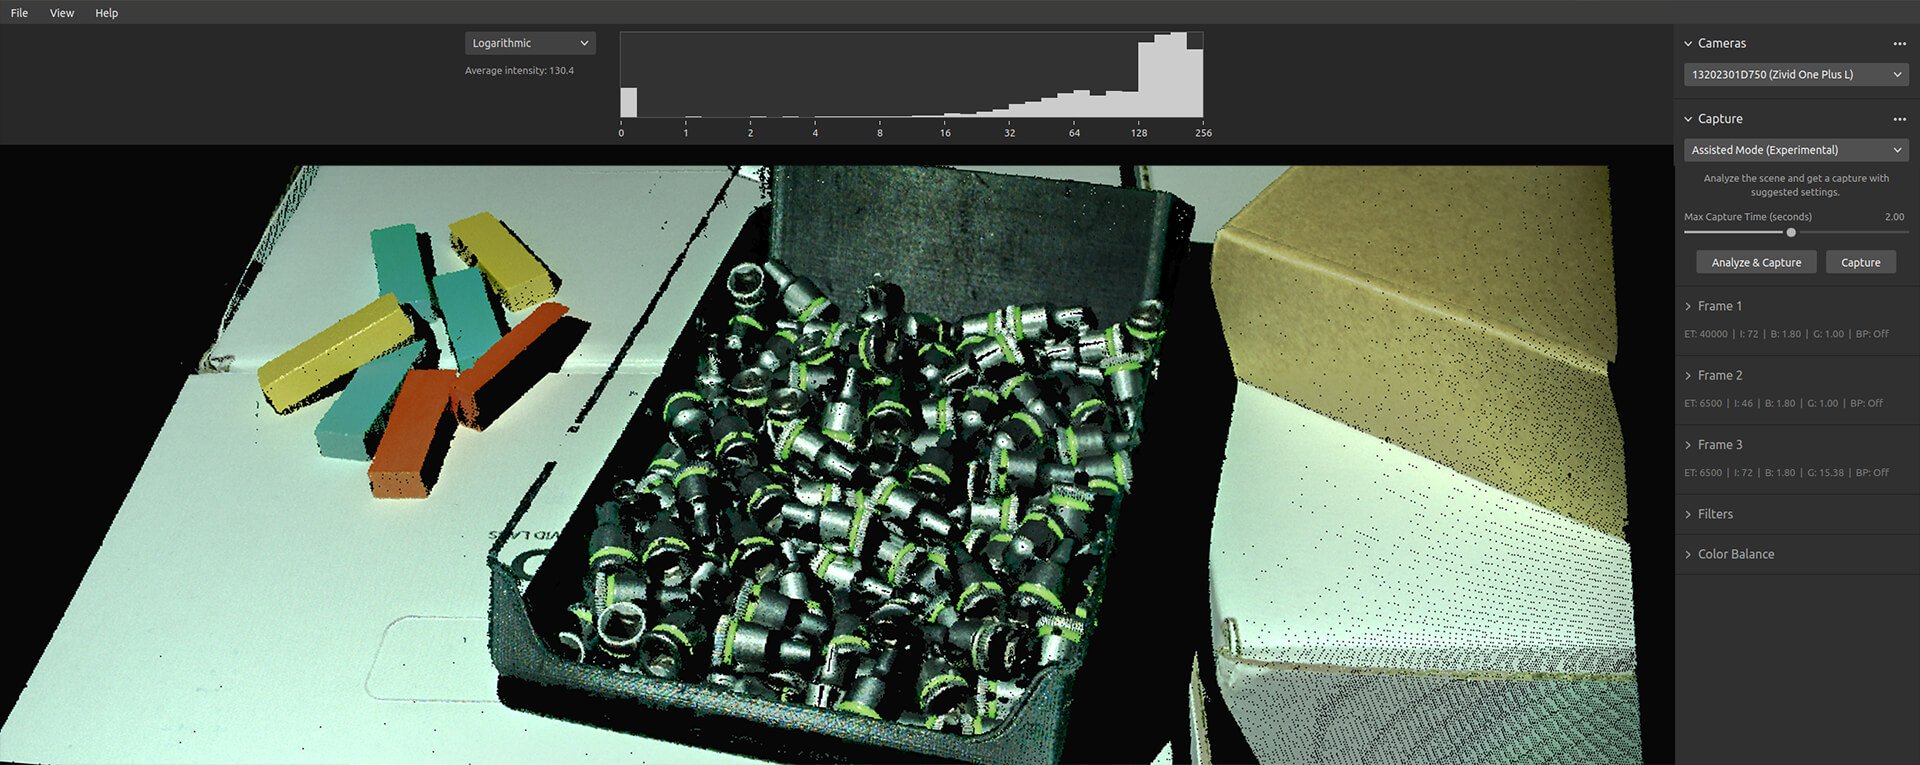
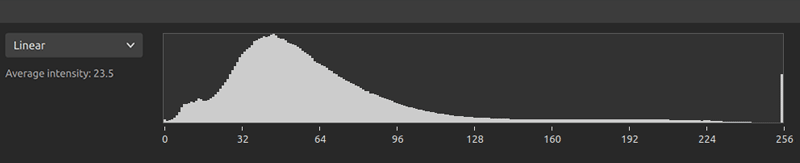
HISTOGRAM
Use the linear view to give you clipping information quickly. Use Shift + H to change to the logarithmic view, which shows you the number of frames and stops needed to optimize a capture.
Selecting a region in the Histogram to see the coverage and saturated pixels.
Zivid SDK and Zivid Studio v1.5

Zivid Wins Red Dot Design Award with Zivid 2+ R-Series